
Introduction
Pixasa is a photo organizer for Windows. It displays your photos grouped by folder, lets you star them, organize them into albums, add tags and captions, find them instantly, and enjoy them in slideshows.
Pixasa is compatible with existing Picasa libraries. If you've used Picasa, your stars, rotations, albums, captions, tags, and folder descriptions will carry over just as they are. Changes you make to stars, rotations, albums, and folder descriptions in Pixasa are also recognized by Picasa.
Photo editing — including cropping, color adjustments, and effects — is not available in Pixasa 1.0. See Coming from Picasa for a full overview of what's not yet supported.
Coming from Picasa
Pixasa 1.0 is a photo organizer and viewer. If you're coming from Picasa, some features aren't available yet.
Your existing Picasa data is safe. Pixasa preserves your existing edits, face information, names, tags, albums, captions, and location data exactly as they are. It doesn't modify or delete this information, even if it can't display or use some of it yet. You can continue using Picasa alongside Pixasa without losing your existing organization.
Features not yet available in Pixasa 1.0 include photo editing, fine-tuning and effects, Faces and People, Places, export and sharing, camera and memory card import, Picasa library import (in Pixasa 1.0, you select your folders again; see Choosing Folders), and additional viewing tools.
See the full list of features Picasa has that Pixasa 1.0 doesn't, including those that are not planned.
First Run
The first time you open Pixasa, it asks you to choose two things:
- How Pixasa looks — Choose Classic, Pixasa, or Pixasa Dark. You can change the theme later in Tools › Options.
- Where to look for photos — Choose between searching only My Documents, My Pictures, and the Desktop, or scanning your entire computer. Pixasa never moves or copies your photos.
Pixasa then starts building thumbnails in the background. You can start browsing right away, while additional folders appear as they're processed.
The interface language follows your Windows language if it's supported by Pixasa. Otherwise, English is used.
Pixasa is available in 12 languages: English, Spanish, French, German, Italian, Portuguese, Russian, Korean, Chinese, Dutch, Czech, and Japanese.
Choosing Folders
Open Tools › Folder Manager to decide which folders Pixasa shows. For each folder in the tree you can choose:
| Option | What it does |
|---|---|
| Scan Always | Pixasa adds the folder to your library and keeps watching it. New photos are detected automatically. |
| Scan Once | Pixasa scans the folder once and adds its photos to the library without monitoring it for changes afterwards. |
| Remove from Pixasa | Pixasa removes the folder from its library. Nothing is deleted from your disk. |
Folders on USB drives or network drives work too. If a drive is not connected, its folders simply wait until it comes back.
The Library
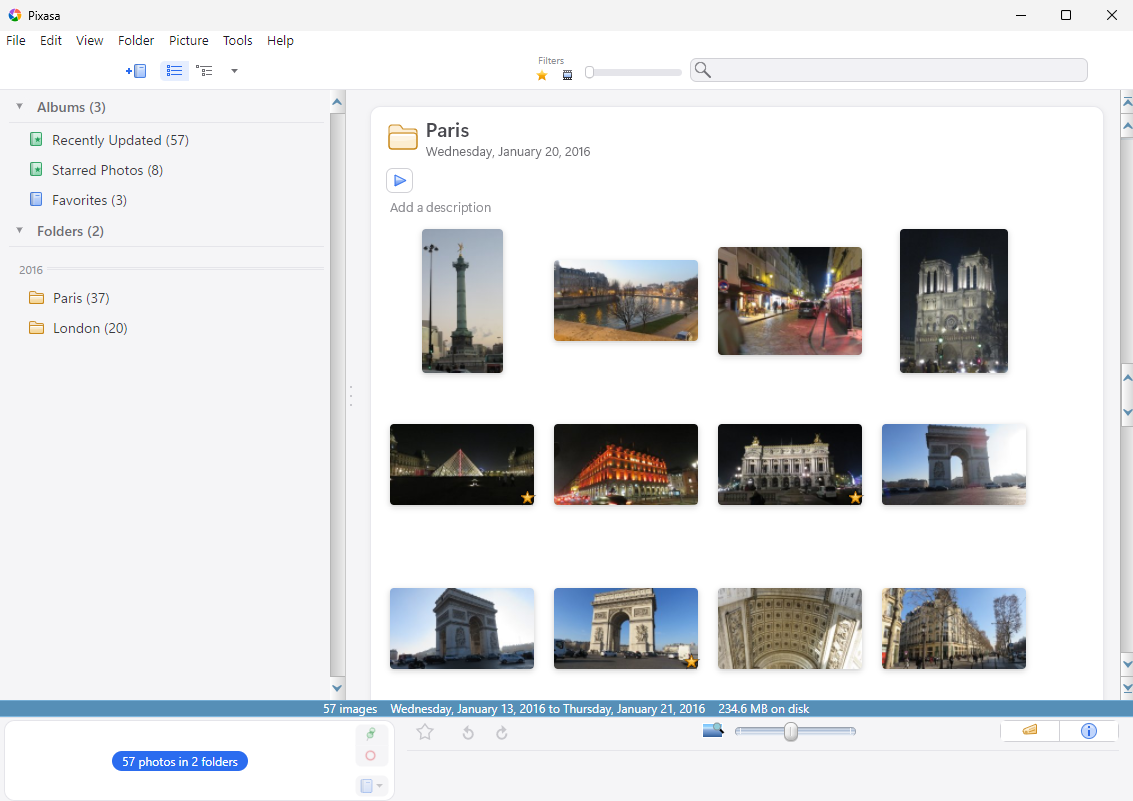
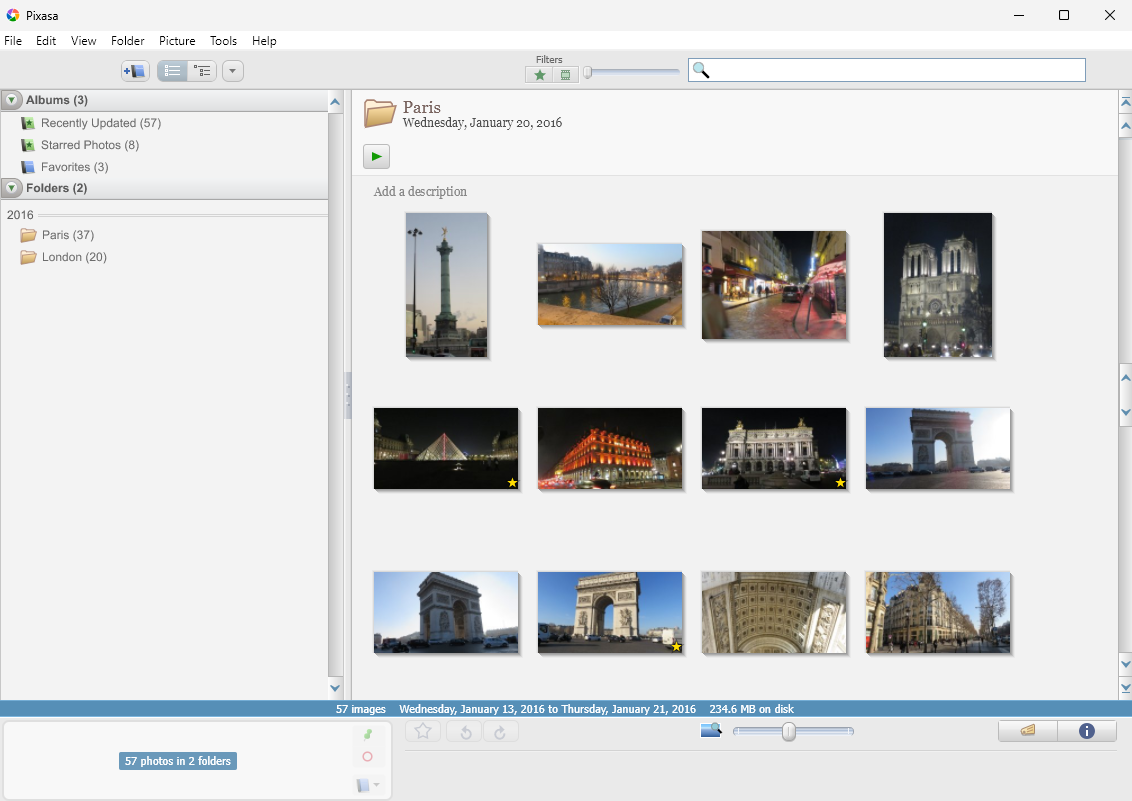
The left panel lists your albums and folders. The main grid displays the photos from all your folders, grouped by folder. Each folder has its own title, date, and description. Click a folder in the left panel to jump directly to it.
Use View › Folder View or the ▾ menu next to the view buttons to sort folders by creation date, recent changes, size, or name. You can also reverse the sort order.
The two buttons next to the ▾ menu switch between flat and tree folder views.
Use the slider at the bottom of the window to adjust the thumbnail size.
Double-click a folder title, or right-click it and choose Edit Folder Description…, to change its name, date, place taken, description, and slideshow music.
Albums, Stars, and the Photo Tray
An album groups photos from any folder without moving the original files. Select the photos you want and press Ctrl+N (or click the book button in the top-left corner) to create an album. You can also use Picture › Add to Album.
To star a photo, press Ctrl+8 or click the star at the bottom of the viewer. All starred photos are automatically collected in the Starred Photos album.
Recently Updated shows photos that have been changed recently.
The Photo Tray at the bottom of the window shows your current selection. Click the green pin or press Ctrl+H to hold your selection while you browse other folders. This lets you gather photos from different locations and work with them all at once.
Albums are fully compatible with Picasa. Albums you create or modify in Pixasa are also recognized by Picasa.
Tags and Captions
Press Ctrl+T (or click the tag button in the bottom-right corner) to open the Tags panel.
Type a tag to apply it to the selected photos, or click one of your quick-access tags. You can choose up to ten quick tags for one-click access.
Captions appear below the photo in the viewer. Pixasa also reads captions and tags embedded in your photos (XMP / IPTC), including those added by other applications such as Picasa.
Tags and captions you add or change in Pixasa are saved separately from your photos, so the original image files are never modified.
The Properties panel (Alt+Enter) shows information about the selected photo, including its file details, camera information, and exposure settings.
Search and Filters
Type in the search box in the top-right corner. Pixasa searches filenames, folder names, captions, tags, and album names as you type. The left panel automatically shows only matching folders and albums.
Press Esc to clear the search.
Use the Filters next to the search box to show only starred photos, videos, or both. Filters can be combined with a search.
Photo Viewer
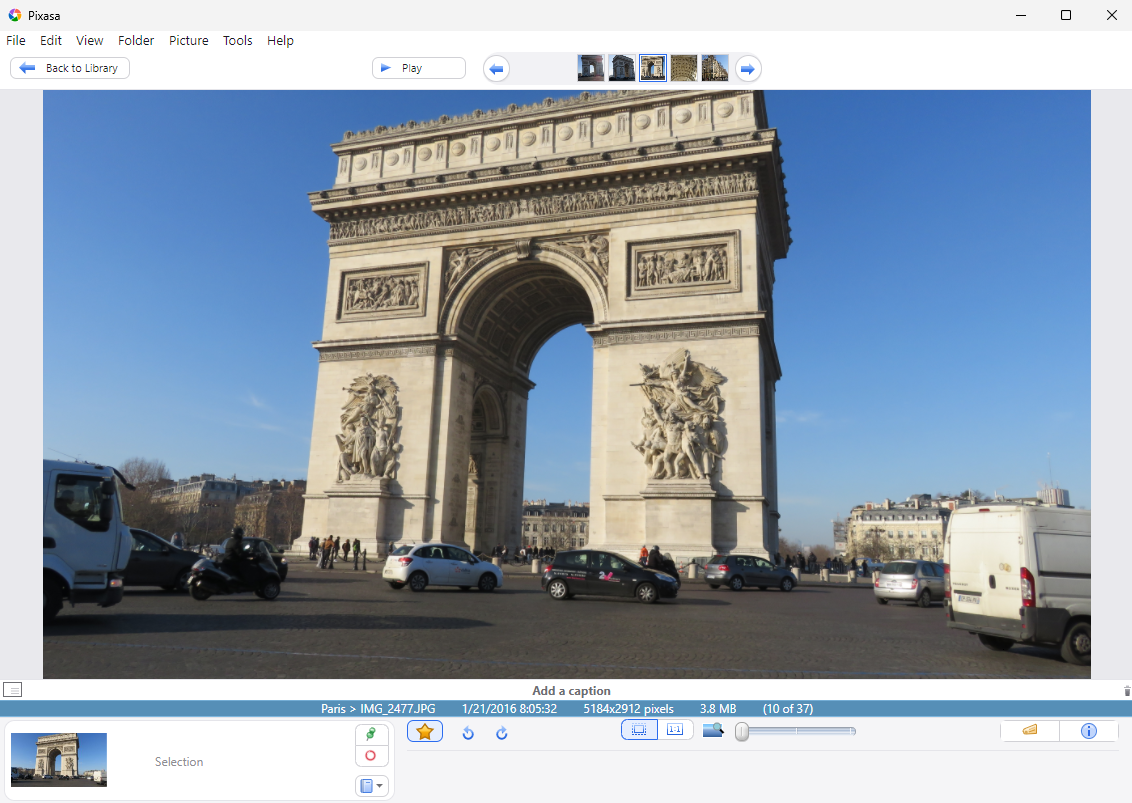
Double-click a photo (or press Enter) to open it in the full-window viewer.
The filmstrip at the top lets you browse photos in the current folder. Use ← and → to move to the previous or next photo, and Home / End to jump to the first or last photo.
Zoom using the mouse wheel or the slider at the bottom, up to 400%. Use Fit to fit the photo to the window or 1:1 to view it at its original size.
You can rotate and star photos, and add captions without leaving the viewer.
Videos play directly in the viewer. Press the Space bar to pause or resume playback.
Use Picture › Set as Desktop Background to set the photo as your Windows wallpaper. Pixasa uses a copy, so the original photo is never modified.
Press Esc or click Back to Library to return to the photo grid.
Slideshow
Press Ctrl+4 or click the ▶ button next to a folder to start a full-screen slideshow. Move the mouse to display the slideshow controls.
- 7 transitions: Cut, Pan and Zoom, Dissolve, Wipe, Circle, Pulse, and Rectangle.
- Display time: 2 to 20 seconds per photo.
- Captions: show or hide photo captions.
- Photo controls: rotate, star, and zoom while the slideshow is running.
- Playback: press the Space bar to pause or resume, use the arrow keys to move between photos, and press Esc to exit.
Music: Choose a folder of music tracks in Tools › Options › Slideshow, or assign an individual track to a folder through its properties.
Enable Loop Slideshow to automatically restart the slideshow when it reaches the end.
Your Files Are Safe
Your photos are never modified. Pixasa never changes the original image or video files.
All changes to your photo organization data are saved safely. Pixasa writes to a temporary file first and then replaces the previous version, reducing the risk of data corruption if your computer loses power or shuts down unexpectedly.
Any Picasa information Pixasa doesn't currently support, such as faces, edits, and places, is preserved exactly as it was.
The first time Pixasa runs, it automatically backs up your existing Picasa data.
You can create additional backups at any time using Tools › Back Up… and restore one folder, multiple folders, or your entire library. Before restoring, Pixasa automatically creates a Before Restore backup, so you can go back if needed.
Read-only mode (Tools › Options) prevents Pixasa from writing anything outside its own data folder.
When you choose Delete from Disk, files are sent to the Windows Recycle Bin rather than being permanently deleted.
Settings
Open Tools › Options to access Pixasa's settings, organized into three tabs:
| Tab | What you'll find |
|---|---|
| General | Confirmation prompts for deleting and removing items, read-only mode, language, theme, rendering options (automatic GPU acceleration or CPU-only), and the data folder containing the catalog, thumbnails, backups, and logs. You can move this folder to another drive at any time. |
| File Types | Choose which file types Pixasa displays, including JPEG, PNG, GIF, BMP, TIFF, TGA, WebP, PSD, RAW, and video formats. |
| Slideshow | Loop playback and slideshow music folder. |
Changes to the language, theme, and rendering settings take effect after restarting Pixasa.
Pixasa automatically remembers your window size and position between sessions.
Keyboard Shortcuts
Press F1 anywhere in Pixasa to see this list.
Library
| Keys | Action |
|---|---|
| Enter / Ctrl+3 | Open the selected photo in the viewer |
| Ctrl+4 | Start a slideshow |
| Ctrl+A | Select all photos in the current folder or album |
| Ctrl+D | Clear the selection |
| Ctrl+I | Invert the selection |
| Home / End | Go to the first / last photo in the folder (hold Shift to extend the selection) |
| ← / → | Previous / next photo |
| ↑ / ↓ / Page Up / Page Down | Scroll through the photo grid |
| Ctrl+H | Hold the selection in the Photo Tray |
| Ctrl+R / Ctrl+Shift+R | Rotate clockwise / counterclockwise |
| Ctrl+8 | Star / unstar |
| Ctrl+T | Open the Tags panel |
| Ctrl+N | Create a new album with the selected photos |
| Ctrl+Enter | Locate the photo on disk |
| Shift+Enter | Locate the photo in Pixasa (when viewing an album) |
| Del / Ctrl+Del | Delete from disk (to the Recycle Bin). In an album, Del removes the photo from the album without deleting the file; Ctrl+Del always deletes from disk. |
| Alt+Enter | Show Properties |
| Ctrl+Shift+O | Open the file with the default Windows application |
| Ctrl+O | Open a file from disk in the viewer |
| Ctrl+1 / Ctrl+2 | Small / large thumbnails |
| Hold Ctrl+Alt | Preview the photo under the mouse pointer |
| F11 | Toggle full-screen mode |
| F1 | Show keyboard shortcuts |
Viewer
| Keys | Action |
|---|---|
| ← / → | Previous / next photo |
| J / K | Next / previous photo |
| Home / End | First / last photo in the folder |
| Del / Ctrl+Del | Delete from disk (to the Recycle Bin). In an album, Del removes the photo from the album without deleting the file. |
| Esc | Return to the library or exit full-screen mode |
| Mouse wheel | Zoom in / out |
| Page Up / Page Down / + / − | Zoom in / out |
| 1 | Toggle between 100% zoom and Fit |
| 8 / Ctrl+8 | Star / unstar |
| Ctrl+R / Ctrl+Shift+R | Rotate clockwise / counterclockwise |
| F11 | Toggle full-screen mode |
| Space / / | Play / pause video |
| , / . | Rewind / fast-forward 5 seconds in a video |
| F1 | Show keyboard shortcuts |
Mouse (in the photo grid)
| Action | Result |
|---|---|
| Click | Select a photo |
| Ctrl+click | Add or remove a photo from the selection |
| Shift+click | Select all photos between the previously selected photo and the clicked photo |
| Drag | Select photos using a rectangle (start dragging from an empty area) |
| Double-click | Open the photo in the viewer |
| Right-click | Open the context menu for a photo, folder, or album |
Troubleshooting
| What you see | Likely cause | What to do |
|---|---|---|
| A folder is missing | It hasn't been added in Folder Manager, or its drive is disconnected. | Open Tools › Folder Manager and set the folder to Scan Always. If it's on an external or network drive, make sure the drive is connected. |
| Changes are not saved | Read-only mode is enabled. | Turn off Read-only mode in Tools › Options › General. |
| Pixasa switches to CPU rendering | Pixasa previously failed to render its window using the graphics card. | Update your graphics driver, then select Automatic again in Tools › Options. |
| A HEIC or RAW photo cannot be displayed | The file uses an unsupported or unusual variant of the format. | Send us the error message (see below). The original file is never modified. |
| Pixasa won't start: ".NET is missing" | The .NET 10 Desktop Runtime is not installed. | Install the free .NET 10 Desktop Runtime from Microsoft. The Pixasa installer provides a link to the download. |
When Pixasa shows an error in its status bar, click Copy next to it: the message, the Pixasa version and the folder of the logs go to the clipboard, ready to paste in an email to GDZ Software.
Supporting Development
If you find Pixasa useful and would like to support its continued development, you can make a donation via PayPal or Ko-fi.
Every contribution is appreciated and helps keep Pixasa growing.
Thank you for using Pixasa!